September 25, 2024
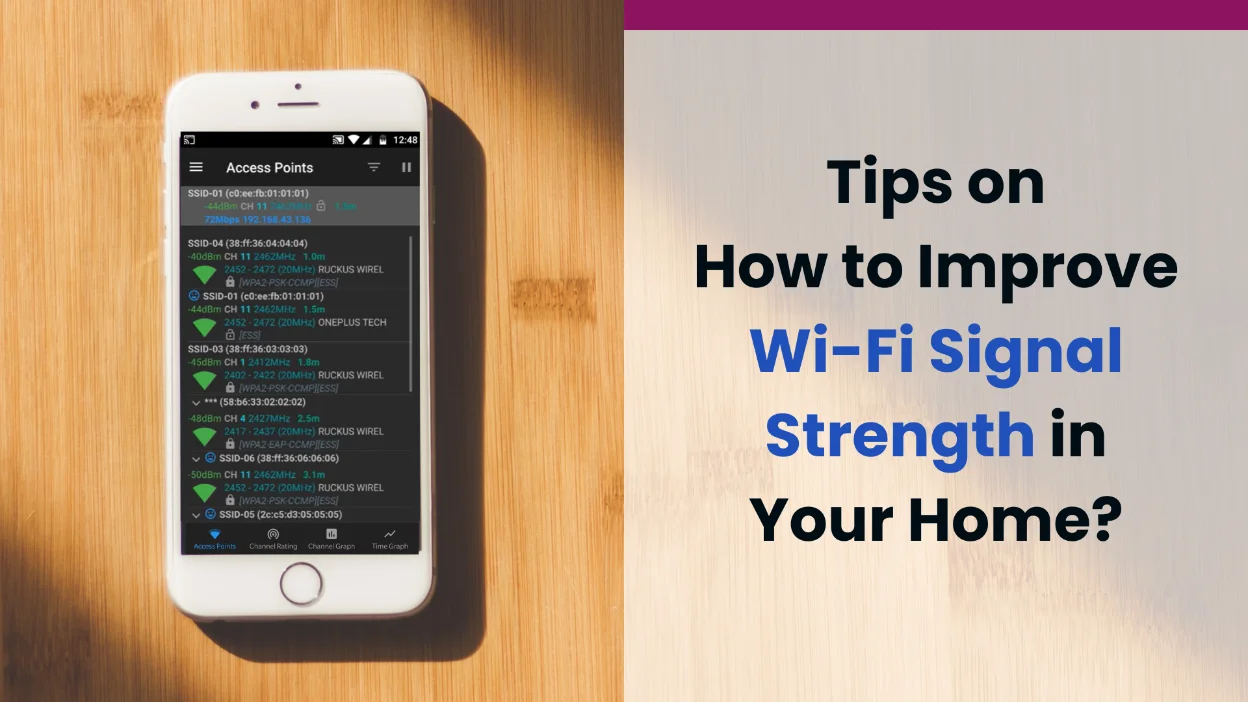
Tips on How to Improve Wi-Fi Signal Strength in Your Home?
Being online might not be as essential as breathing, but sometimes it feels that way. Wi-Fi is one of the most widely used technologies that connects us to the internet. Dealing with slow internet, dropped Wi-Fi signals, and dead zones is incredibly frustrating. Many people encounter Wi-Fi problems almost daily, often related to signal issues.
In this article, we'll address questions like how to test Wi-Fi signal strength and find the answer to the question ”How do I improve my Wi-Fi signal strength?” By focusing on factors such as router placement, interference reduction and optimizing settings, you can significantly enhance your Wi-Fi experience. Let's explore some effective tips to achieve better Wi-Fi coverage in your home.
How to test signal strength using tools?
Testing your Wi-Fi signal strength helps identify weak spots and optimize your network. Here's How to check Wi-Fi signal strength using available tools:
Step 1: Choose a Signal Strength Testing Tool
There are a number of tools readily available that can help you test signal strength. Some of the more popular and effective include:
NetSpot: Available for macOS and Windows, this tool provides detailed signal strength maps and analysis.
Wi-Fi Analyzer (open-source): An Android app that offers real-time signal strength readings and channel analysis.
AirPort Utility: An iOS app from Apple that includes a Wi-Fi scanner to measure signal strength.
Step 2: Install the Tool
Download and install the chosen app on your device. Ensure that your device is connected to the Wi-Fi network you want to test.
Step 3: Perform the Test
To perform the signal strength test, simply:
(a) Connect to the Wi-Fi network you want to scan.
(b) Launch the signal strength testing tool on your device.
(c) Move around your home with the app running, noting the signal strength readings in different areas.
Step 4: Interpret the Result
Signal strength is usually measured in decibels relative to a milliwatt (dBm). During the test, the screen will say something like -45 dBm or a variation of it. A signal strength of -30 dBm is excellent, while -90 dBm is unusable. Aim for a signal strength of -30 dBm to -67 dBm for a reliable connection.
So, try to evaluate the signal strength readings to identify weak spots and patterns. Look for areas with signal strengths below -67 dBm and consider factors such as physical obstructions, interference and distance from the router.
Reasons Why You Might Have a Poor Wi-Fi Signal
There are some obvious and some less obvious reasons why someone might have a poor Wi-Fi signal.
Physical Obstructions:
(a) Wi-Fi signals can struggle to penetrate thick walls and floors, particularly those made of concrete, brick, or metal. These materials absorb and block signals, leading to weak connectivity in certain areas of your home.
(b) Large pieces of furniture and household appliances, such as refrigerators, can obstruct Wi-Fi signals. Metal objects and water (e.g., fish tanks) are particularly problematic as they can reflect or absorb the signal.
Interference from Other Devices:
(a) Devices like microwaves, cordless phones, baby monitors and Bluetooth gadgets operate on similar frequencies (2.4 GHz) as Wi-Fi and can cause significant interference.
(b) In densely populated areas, multiple Wi-Fi networks can overlap and interfere with each other, especially if they are operating on the same channel.
Router Position:
(a) Placing your router in a poor location, like a corner, behind large objects, or inside a cabinet, can significantly limit its ability to distribute Wi-Fi signals. For optimal coverage, it’s best to place the router in a central, elevated spot, such as on a shelf or wall mount. Positioning it on the floor can also reduce its signal range.
(b) Wi-Fi signals weaken as the distance from the router increases. Devices far from the router or in areas obstructed by walls, furniture, or interference (known as dead zones) may experience poor connectivity and slower speeds. To ensure the best performance, avoid placing the router in hidden or obstructed areas and consider its range limits to cover the entire home effectively.
Outdated or Inadequate Hardware:
(a) Older routers may not support the latest Wi-Fi standards (such as Wi-Fi 5 or Wi-Fi 6), resulting in slower speeds and weaker signals.
(b) Routers with limited range, weak antennas, or missing advanced features like MU-MIMO may struggle to cover large homes and handle multiple devices efficiently. Older or budget models often lack the ability to manage high traffic, leading to slower, less stable connections over longer distances.
Channel Overlap:
(a) Routers often default to the same channel, leading to Wi-Fi interference, especially in the crowded 2.4 GHz band where channels are close together and overlap.
(b) Not selecting the optimal channel for your router can lead to increased interference from other networks and devices.
Tips on How to Improve Wi-Fi Signal Strength
After identifying the causes of poor Wi-Fi signal and testing your network, you can take the following steps to improve it:
1. Check Your Wired Internet Connection:
Before assuming it's a Wi-Fi issue, it can be helpful to check your internet connection directly. You can do this by connecting your computer to the router with an Ethernet cable and running a speed test.
If the wired speed is okay but your internet still feels slow, maybe you need a better plan. Test the speed wirelessly near the router. If it's good there but not elsewhere, your Wi-Fi coverage might not reach far enough necessary. If it's still slow near the router, you might need new equipment.
2. Optimize Router Placement:
Where you place your router affects Wi-Fi coverage. Avoid placing it in a cabinet or by a window where the internet cable enters. Instead, consider these tips:
(a) Position your router in a central location within your home to distribute the signal evenly.
(b) Place the router on a shelf or mount it on a wall to reduce interference from furniture and other obstacles.
(c) Keep the router away from thick walls, metal objects, and appliances like microwaves and cordless phones.
3. Update Router Firmware:
To make sure your router works well and stays safe, update your Router Firmware. Here's how:
(a) Identify Router - Model Check labels or settings.
(b) Backup Settings - Save current settings.
(c) Download Firmware - Get the correct file from the manufacturer’s website.
(d) Ensure Stable Power - Connect to a reliable power source.
(e) Access Router Interface - Enter router IP in a browser and log in.
(f) Navigate to the Update Section - Find the firmware update option.
(g) Upload and Install Firmware - Select the file and start the update.
(h) Restart Router - Automatically or manually restart.
(i) Verify Update - Check the new firmware version.
(j) Restore Settings - Restore saved settings if needed.
4. Upgrade Your Router:
If your router is old and not working as well as it used to, consider getting a new one. New routers with improved technology can enhance your internet speed and reliability, thereby expanding the range of Wi-Fi signals at home.
Look for routers labeled as "dual-band," "tri-band," or "MU-MIMO," as they can support multiple devices simultaneously without slowing down. Upgrading your router can make a significant difference in the range and performance of your Wi-Fi signal.
Some router recommendations that match the above features include - TP-Link Archer AX73, Netgear Nighthawk RAX40 and ASUS RT-AX88U.
5. Adjust Router Antennas:
Adjusting your router's antennas can increase the range of the Wi-Fi signal. Position the external antennas vertically to cover a wider area. For homes with multiple floors, consider adjusting one antenna horizontally to better distribute the Wi-Fi signal across different levels. These simple adjustments can enhance the strength and reliability of your internet connection throughout your home.
6. Use Wi-Fi Extenders or Mesh Networks:
You can improve your home Wi-Fi signal range and eliminate dead spots by using Wi-Fi extenders or a mesh network system.
Dead spots are areas in your home where the Wi-Fi signal is weak or nonexistent, often caused by distance from the router or interference from walls and other obstacles. Wi-Fi extenders amplify the existing signal, extending coverage to these hard-to-reach areas.
On the other hand, mesh networks consist of multiple connected nodes that work together to provide consistent, strong Wi-Fi coverage throughout your entire home, effectively eradicating dead spots and ensuring a reliable internet connection everywhere.
7. Change Wi-Fi Channel:
The 2.4 GHz and 5 GHz frequency bands have their own strengths and weaknesses. The 2.4 GHz band covers a wider range but offers slower speeds, while the 5 GHz band provides faster speeds, ideal for activities like gaming, video conferencing and large file downloads, though it covers a smaller area.
When choosing the right channel for your Wi-Fi, it's essential to avoid interference from household appliances like microwaves and TVs that operate on the 2.4 GHz band. The 5 GHz band doesn’t face these issues but struggles to penetrate walls and furniture.
Here’s how to change your Wi-Fi channel:
(a) Open your web browser and enter your router’s IP address (e.g., 192.168.1.1 or 192.168.0.1).
(b) Log into the router’s settings.
(c) Navigate to "Wireless" or "Wi-Fi" settings.
(d) Choose a different, less crowded channel based on your analysis.
(e) Save the changes and restart your router if necessary.
8. Secure Your Network:
Secure your Wi-Fi with a strong password and WPA3 encryption to protect your network and keep your information safe. Follow these steps:
(a) Log in to your router with your IP address (e.g., 192.168.1.1 or 192.168.0.1).
(b) Change the admin password.
(c) Enable WPA3/WPA2 encryption.
(d) Set a strong Wi-Fi password.
(e) Disable WPS.
(f) Update firmware.
(g) Activate router firewall.
(h) Limit DHCP range.
(i) Monitor connected devices.
9. Limit Bandwidth-Hogging Applications:
Use Quality of Service (QoS) settings to prioritize important devices and apps for faster speeds and schedule large downloads for off-peak times to improve internet efficiency and reduce slowdowns. Here’s how:
- Login: Access your router’s settings via its IP address.
- Find QoS: Locate the QoS section, often under “Advanced” or “Traffic Management”.
- Enable QoS: Toggle QoS to "On".
- Configure Rules:
(a) Prioritize Traffic: Set priority for applications (e.g., streaming, gaming), devices or ports.
(b) Set Bandwidth Limits: Allocate bandwidth for different types of traffic.
- Define Priority Levels: Assign high, medium, or low priority based on needs.
- Save and Apply: Save changes and apply settings.
- Monitor and Adjust: Check performance and adjust as needed.
10. Call Your ISP
If you've tried everything and still have problems with your internet, don't hesitate to call your internet service provider (ISP). They can send a technician to your home who can find any problems that might have been missed. This way, you can get back to enjoying fast Wi-Fi without any interruptions.
Final Thoughts
In summary, making your Wi-Fi signal stronger can make your internet better at home. By understanding common problems like obstacles and interference, and using tools to check signal strength, you can fix connectivity issues. Simple steps like placing your router better, upgrading equipment, and adjusting antennas can really help.
Whether updating firmware or adding Wi-Fi extenders, these actions improve internet reliability throughout your home. Following these easy tips makes troubleshooting and improving your Wi-Fi straightforward, leading to smoother online experiences overall